
Do you want to renovate your kitchen space? Discovering how to install kitchen cabinets can be a game-changer. Besides being eye-catching, kitchen cabinets play a big role in organizing your culinary paradise. You’ve come to the right place if you’re thinking about a kitchen makeover.
In this guide, we’ll explain how to install cabinets in the kitchen step-by-step. Using our detailed instructions and practical tips, you’ll be able to transform your kitchen into something beautiful and functional. Let’s dive in.
How to Install Kitchen Cabinets: Step By Step Guide
Using the following kitchen cabinet installation step-by-step guide, you can install your own kitchen cabinets.
1. Planning Your Cabinet Installation
Plan carefully before you start swinging hammers and drilling holes for your kitchen cabinet installation project. A little planning will save you time, money, and headaches down the road. You should consider the following:
Budget and Design Preferences
Set a budget for the project. Cabinets come in a variety of styles and materials, which can affect their cost. Choose custom cabinets or pre-made ones, because this can affect your budget and design.
Choose a design that suits your preferences. Are you looking for a modern, traditional, or unique kitchen style? Build a vision board based on your design ideas and inspirations. When choosing cabinet styles, colors, and finishes, this will help you focus.
Measure Your Kitchen Space
A successful kitchen cabinet installation begins with accurate measurements. Make sure you measure your kitchen space carefully. Note the height, width, and depth of the areas where the cabinets will be placed. If you make even a small measurement error, it can result in a fitting issue later on.
Choose the Right Cabinet Sizes
Select cabinets that fit your kitchen perfectly based on your measurements. Various cabinet sizes are available, so it’s important to choose ones that maximize your kitchen’s storage potential.
2. Gathering Tools and Materials
The next step after planning your kitchen cabinet installation is to gather the necessary tools and materials. Here’s a comprehensive list of what you’ll need:
Kitchen Cabinet Installation Tools

- Screwdriver: An electric or manual screwdriver for securing cabinets in place.
- Level: It makes sure your cabinets are installed straight and even.
- Drill: For making holes for screws and attaching cabinets firmly.
- Measuring Tape: An accurate measurement is essential to a successful installation.
- Pencil: Used to mark wall studs and cabinet placements.
- Stud Finder: Locates wall studs for secure cabinet mounting.
- Clamps: Useful for holding cabinets in position during installation.
- Saw: To trim or adjust cabinets to fit your space.
- Shims: Used to level and plumb cabinets.
- Safety Gear: Safety glasses, gloves, and ear protection for a safe installation.
Kitchen Cabinet Installation Materials

- Cabinets: Come in a variety of sizes and styles to fit your project.
- Screws: Usually included with your cabinets, but extras may be needed.
- Wall Anchors: They are useful if you need to support your cabinets more.
- Cabinet Hardware: Handles, knobs, and pulls for the finishing touch.
- Wood Glue: Adds stability to cabinets if necessary.
- Caulk: Seals gaps between cabinets and walls.
- Paint or Finish: If you intend to paint or finish your cabinets.
- Cabinet Filler Strips: Fill gaps between cabinets and walls.
Your installation process will be faster and easier if you have the right tools and materials.
3. Removing Old Cabinets
Installing new cabinets requires you to remove old kitchen cabinets. It’s important to remove old cabinets before renovating your kitchen. You can do it this way:
Turn Off Utilities
Ensure your safety first. Turn off any utilities connected to cabinets you’re removing, like gas and electricity. It’s crucial to prevent work accidents.
Empty Cabinets
Remove all items from the old cabinets, making sure they are completely empty. During the removal process, you don’t want anything to fall or get damaged.
Detach Doors and Drawers
Unscrew cabinet doors and drawers and remove them. It will make the cabinets lighter and easier to handle. Don’t throw away the screws and hardware; you might need them later.
Locate Wall Studs
Locate the wall studs behind the old cabinets using a stud finder. Make pencil marks at these locations. For securely anchoring your new cabinets, you need wall studs.
Begin Removal
Carefully unbolt and detach the upper cabinets from the wall. If you need help lifting upper cabinets, ask a friend. The lower cabinets are usually secured to the floor too, so make sure you disconnect them.
Patch and Repair
After removing the old cabinets, you’ll probably have holes or marks on your walls and floor. This is a good time to patch up and repair any damage. Taking this step will ensure that your new cabinets are installed on a clean canvas.
4. Assembling Cabinets

Once you’ve cleared out your old cabinets, it’s time to assemble your new ones. A properly assembled cabinet is structurally sound and ready for installation. The following steps will help you accomplish this crucial task:
- Follow the manufacturer’s assembly instructions carefully.
- Set up a clean, organized workspace with enough space to lay out all the cabinet components.
- Assemble your cabinets step by step, attaching the sides, backs, shelves, and components as directed.
- Be sure to use the screws and hardware that came with your cabinets to ensure structural integrity.
- During assembly, verify measurements and alignment to ensure a seamless fit.
- Ensure that handles, knobs, and other hardware are attached accurately for both functionality and aesthetics.
- Before installing each cabinet, check for any missing parts or defects.
5. Installing Base Cabinets

Now that you’ve assembled your cabinets, it’s time to install them. Let’s start with the base cabinets, which form the foundation of your kitchen. Follow these steps for a secure and level installation:
- Mark the locations of wall studs with a stud finder. You need these to anchor your cabinets securely to the wall.
- Set a level baseline. Install a ledger board (a temporary support board) along the wall at the height of your base cabinets. Anchor it securely to the wall and make sure it’s level.
- Starting with corner cabinets is the best way to begin. Your cabinet installation will begin with these components. Make sure they are aligned with the ledger board and fix them to the wall.
- Install the standard base cabinets one by one, making sure they’re level and plumb. Make adjustments with shims if needed.
- Using the provided hardware or cabinet clamps, connect each base cabinet together. As a result, the configuration is seamless and stable.
- Maintain proper alignment and gap spacing between cabinets. Maintain a uniform and level installation by making adjustments as necessary.
- Consider securing base cabinets to the floor for additional stability. To prevent movement, use the appropriate screws or anchors.
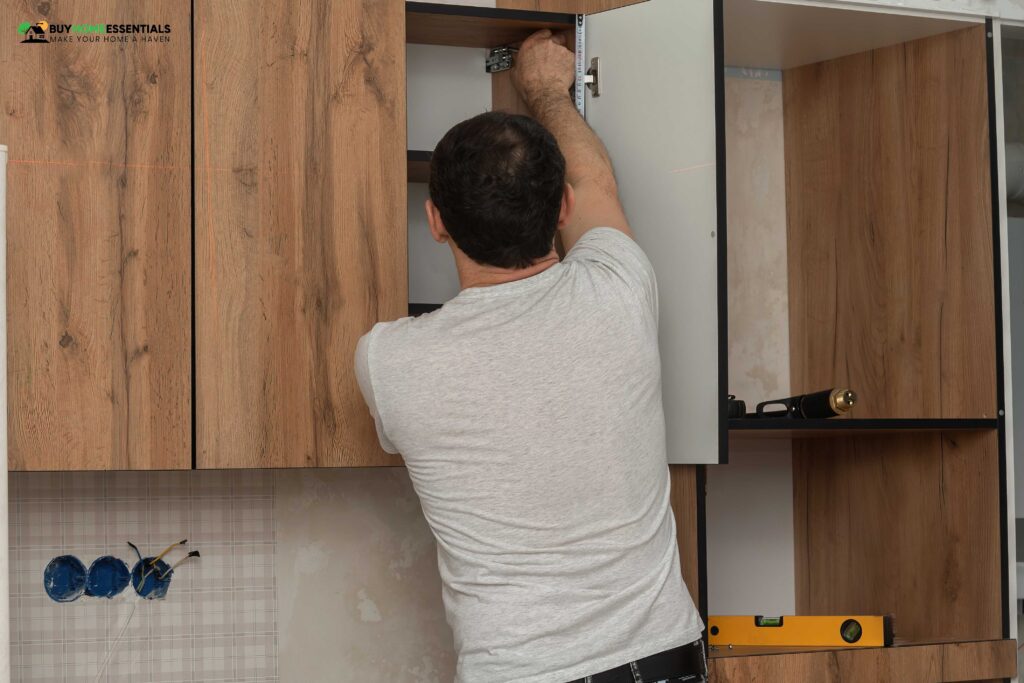
6. Hanging Wall Cabinets

Now that your base cabinets are securely in place, it’s time to hang the wall cabinets. Besides providing storage, wall cabinets look great in your kitchen. For a successful installation, follow these steps:
- Use a level and pencil to mark the desired height for your wall cabinets.
- Use a stud finder to find and mark the positions of wall studs for secure cabinet attachment.
- During installation, attach a temporary support board (ledger board) to the marked height.
- Hang the first wall cabinet, align it with the temporary support board, and secure it to the wall studs.
- Hang the remaining wall cabinets, ensuring that they are level and spaced correctly. If adjustments are needed, use shims.
- Use a level regularly to ensure cabinets are plumb and level. For a uniform installation, adjust as necessary.
- For stability, use the provided screws or brackets to attach cabinets to each other.
7. Installing Cabinet Hardware

Once your cabinets are in place, it’s time to add the finishing touches: cabinet hardware. Whether you prefer handles, knobs, or pulls, here’s how to install them properly:
- Decide where handles, knobs, and pulls should be placed. Mark the spots and drill pilot holes.
- Use the provided screws to secure the hardware. Make sure the alignment and tightness are correct.
- Maintain a consistent placement pattern throughout your kitchen.
- Open and close cabinet doors and drawers to ensure smooth operation. If necessary, make adjustments.
- Clean up any installation debris.
8. Final Touches and Adjustments
As your cabinet installation gets closer to completion, make sure your cabinets are aligned, level, stable, and ready for use. Here’s what you need to do:
Check Alignment and Gaps
- Ensure that cabinets are level and aligned both horizontally and vertically.
- Maintain an even gap between cabinets for a polished appearance.
- Use adjustable hardware to correct any misalignment or leveling problems.
Maintain and Clean Your Cabinets
- Clean cabinet surfaces regularly with a damp cloth to remove dust and spills.
- Avoid abrasive cleaners that may harm the finish.
- Tighten cabinet hardware as necessary.
- Protect cabinet interiors with liners or organizers.
- For wood-finished cabinets, use wood conditioner or polish to keep them looking good.
Maintaining your newly installed cabinets properly will ensure they stay functional and attractive for years to come.
Read More: How to Decorate the Kitchen Counter
The Takeaway
That’s all from today’s round-up on how to install kitchen cabinets. You have successfully installed your kitchen cabinets! You now have a functional and aesthetically pleasing kitchen. It took careful planning, careful execution, and attention to detail to achieve this.
Adding new cabinets to your kitchen not only enhances its look but also adds storage space. You should maintain and care for them to ensure they remain in great shape for a long time. Hopefully, you have found our guide on how to install kitchen cabinets for beginners useful. If you have any questions, please feel free to comment below.


